

The Art of Shahi Biryani: A Step-by-Step Guide
Crafting a truly authentic Shahi Biryani requires attention to detail, but the reward is an unparalleled dining experience. While the recipe below focuses on chicken, it can be easily adapted for mutton (requiring longer cooking time for the meat) or even vegetables for a vegetarian version.Yields: 4-6 servings
Prep time: 45 minutes (plus marination time)
Cook time: 1 hour 15 minutes
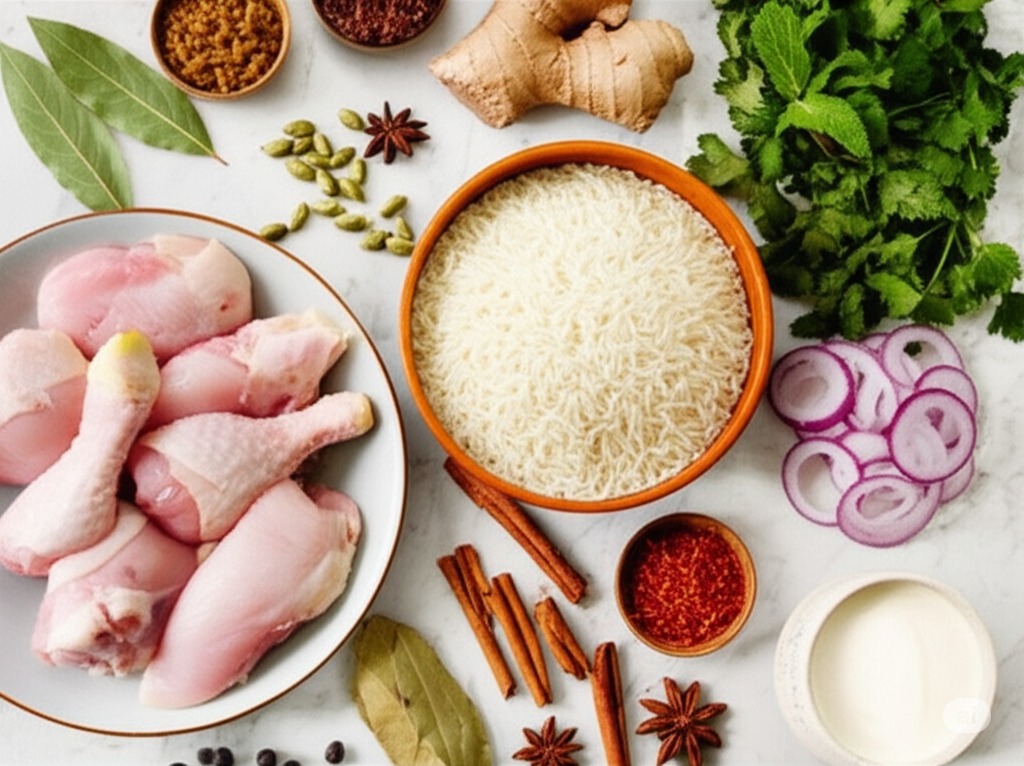
Ingredients:
For the Chicken Marination:
500g chicken (bone-in pieces, preferably thigh/drumstick), washed and pat dried
1 cup plain yogurt (dahi), whisked
2 tbsp ginger-garlic paste
1 tsp red chili powder (adjust to preference)
1 tsp coriander powder
½ tsp turmeric powder
½ tsp garam masala
2-3 green chilies, slit (optional)
Salt to taste
For the Biryani Layers:
2 cups aged Basmati rice
2 large onions, thinly sliced
½ cup ghee (clarified butter)
2-3 tbsp cooking oil
For the Biryani Layers:
2 cups aged Basmati rice
2 large onions, thinly sliced
½ cup ghee (clarified butter)
2-3 tbsp cooking oil
Whole Spices:
2-3 green cardamom pods
2 black cardamom pods
1-inch cinnamon stick
4-5 cloves
2-3 bay leaves
1 star anise
½ tsp shahi jeera (caraway seeds - optional, but authentic)
A pinch of saffron strands, soaked in ¼ cup warm milk
¼ cup fresh mint leaves, chopped
¼ cup fresh coriander leaves, chopped
2 tbsp fried cashews and almonds (optional, for garnish)
1 tsp kewra water or rose water (optional, for fragrance)
Lemon wedges for serving

Instructions:
1. Marinate the Chicken:
In a large bowl, combine chicken pieces with yogurt, ginger-garlic paste, red chili powder, coriander powder, turmeric powder, garam masala, green chilies (if using), and salt. Mix well, ensuring all pieces are coated.
Cover and refrigerate for at least 1 hour, or preferably 4-6 hours, or even overnight for best results.
2. Prepare the Birista (Fried Onions):
Heat 4-5 tbsp ghee and oil in a heavy-bottomed pan or kadai over medium heat.
Add the thinly sliced onions and fry, stirring continuously, until golden brown and crispy. This takes time (15-20 mins) – be patient and don't let them burn.
Once done, remove the onions with a slotted spoon and spread them on a paper towel to drain excess oil. These are your 'birista'. Reserve half for garnish and half for the chicken gravy.
3. Cook the Chicken Gravy:
In the same pan (or a fresh one if needed) with the remaining ghee/oil, add the whole spices (green & black cardamom, cinnamon, cloves, bay leaves, star anise, shahi jeera). Sauté for 30 seconds until fragrant.
Add the marinated chicken (along with the marinade) to the pan. Cook on medium-high heat for 10-15 minutes, stirring occasionally, until the chicken is lightly seared and the yogurt starts to thicken and oil separates from the masala.
Add about half of the prepared birista (fried onions) to the chicken. Stir well. Lower the heat, cover, and let it simmer for another 10-15 minutes, or until the chicken is about 70-80% cooked and tender. Self-correction: If using mutton, this step will take significantly longer, often requiring pressure cooking until 90% done.
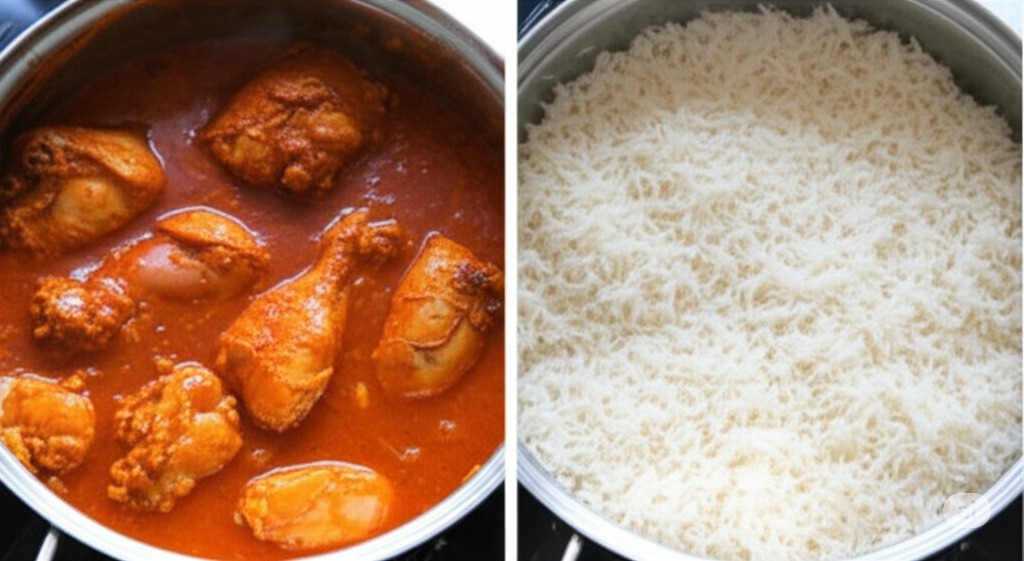
4. Cook the Basmati Rice:
While the chicken is cooking, wash the Basmati rice thoroughly under running water until the water runs clear. Soak it in fresh water for at least 30 minutes.
In a large pot, bring plenty of water to a rolling boil. Add 1-2 tsp salt and a few drops of oil (prevents sticking). You can also add a few whole spices (like 2 green cardamoms, 1 bay leaf) for extra fragrance.
Drain the soaked rice and add it to the boiling water. Cook for only 5-7 minutes, or until the rice is 70-80% cooked (it should still have a slight bite, known as "al dente"). Overcooking the rice will make the biryani mushy.
Immediately drain the rice through a colander.
5. Layering (Dum Pukht Method):
Choose a heavy-bottomed pot or Dutch oven for layering (the same one used for chicken gravy works well if it's large enough).
Layer 1 (Base): Spread about half of the cooked chicken gravy evenly at the bottom of the pot.
Layer 2 (Rice): Gently spread half of the par-cooked Basmati rice over the chicken gravy.
Layer 3 (Garnish 1): Sprinkle some of the remaining birista, chopped mint leaves, and chopped coriander leaves over the rice. Drizzle a teaspoon of ghee.
Layer 4 (Chicken): Add the remaining chicken gravy.
Layer 5 (Rice): Spread the remaining Basmati rice evenly on top.
Layer 6 (Garnish 2): Sprinkle the rest of the birista, mint, and coriander. Drizzle the saffron milk evenly over the rice. Sprinkle 1-2 tbsp of ghee. Add the kewra or rose water if using.

6. Dum Cooking:
Cover the pot tightly with a lid. For an authentic dum, you can seal the edges of the lid with a strip of atta (dough) to trap the steam inside.
Place the pot on high heat for 5-7 minutes to build up steam.
Then, reduce the heat to very low. You can also place the pot on a heavy tawa (griddle) to prevent direct burning from the bottom. Let it cook on dum for 25-30 minutes.
Turn off the heat and let the biryani rest, undisturbed, for another 10-15 minutes. This allows the steam to settle and the flavors to fully develop.
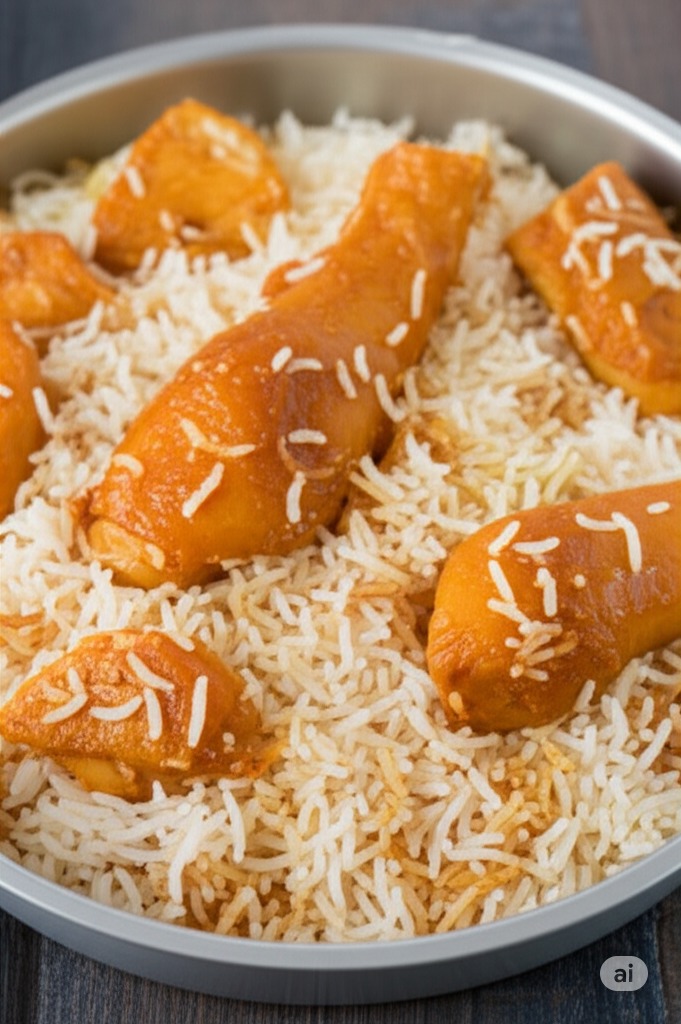
Serving Your Shahi Biryani:
Gently fluff the biryani with a spatula, mixing the layers slightly to ensure each serving gets a bit of everything. Do not overmix.
Garnish with remaining fried cashews and almonds (if using), fresh mint, and coriander.
Serve hot with a side of cooling raita (yogurt dip with cucumber or mint), a simple kachumber salad, or a rich mirchi ka salan
#ShahiBiryani
#BiryaniRecipe
#IndianFood
#MughlaiCuisine
#RoyalRecipes
#HomemadeBiryani
#CookingAtHome
#Foodie
#RecipeOfTheDay
#AuthenticIndian
#DumBiryani
#AromaticFood
#GourmetCooking
#FoodBlog


.png)


.png)


0 Comments